Have you ever wanted to make your own baby clothes but didn’t know where to start? Or maybe you’re looking for a fun and creative way to spend some quality time with your little one? If so, this article is for you!
Making your own baby clothes can be a rewarding and enjoyable experience. Not only can you save money and reduce waste, but you can also express your personal style and create unique outfits for your baby. Plus, you can involve your baby in the process and have some fun together!
In this article, we’ll show you how to make your own baby clothes in 5 easy steps. You’ll learn how to choose the right materials, patterns and tools, how to cut, sew and decorate your clothes, and how to care for them properly. We’ll also give you some ideas and inspiration for different types of baby clothes you can make.
Step 1: Choose the right materials
The first step to making your own baby clothes is to choose the right materials. You want to use fabrics that are soft, comfortable, breathable and durable for your baby’s skin. You also want to avoid fabrics that are too thick, stiff, scratchy or synthetic, as they can cause irritation or overheating.
Some of the best fabrics for baby clothes are:
Cotton: Cotton is a natural and versatile fabric that is easy to wash and care for. It comes in different weights and textures, such as jersey, flannel, muslin and corduroy. Cotton is ideal for making shirts, pants, dresses, rompers and more.
Fleece: Fleece is a synthetic fabric that is warm, cozy and lightweight. It’s perfect for making jackets, hats, blankets and other winter items. Fleece is also easy to sew and doesn’t fray or shrink.
Knit: Knit is a stretchy and soft fabric that is great for making leggings, socks, hats and other snug-fitting items. Knit can be made from cotton, wool, acrylic or other fibers. Knit is also easy to sew with a serger or a zigzag stitch.
Denim: Denim is a sturdy and durable fabric that is suitable for making jeans, overalls, jackets and other casual items. Denim can be made from cotton or other blends. Denim can be tricky to sew with a regular sewing machine, so you may need a heavy-duty needle or a special foot.
When choosing fabrics for your baby clothes, you should also consider the following factors:
Color: You can choose any color you like for your baby clothes, but you may want to avoid very dark or very light colors that can stain easily or show dirt. You may also want to avoid colors that can fade or bleed in the wash, such as reds, blues and purples. You can use color-safe detergent or vinegar to prevent fading or bleeding.
Pattern: You can choose any pattern you like for your baby clothes, but you may want to avoid very large or very small patterns that can look distorted or busy on your baby’s body. You may also want to avoid patterns that have sharp edges or points that can poke your baby’s skin. You can use scissors or pinking shears to cut out your patterns smoothly.
Quantity: You should have enough fabric to make your desired baby clothes, plus some extra for seam allowances and mistakes. You can measure your baby’s body or use a ready-made pattern to estimate how much fabric you need. You can also use scraps of fabric to make accessories or decorations for your clothes.
Once you have chosen your fabrics, you should wash and dry them before cutting or sewing them. This will help remove any dirt, dust or chemicals from the fabric and prevent shrinking or wrinkling later on. You should follow the care instructions on the fabric label or tag when washing and drying your fabrics.
Step 2: Choose the right patterns and tools
The next step to making your own baby clothes is to choose the right patterns and tools. You can use ready-made patterns that you can buy online or in a store, or you can make your own patterns by tracing your baby’s clothes or using a measuring tape. You can also modify or customize your patterns to suit your preferences and style.
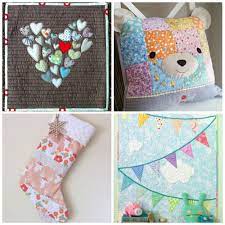
Some of the best sources for baby clothes patterns are:
Sew Baby: Sew Baby is a website that offers a wide range of patterns for baby clothes, accessories, toys and more. You can download or print the patterns in different sizes and formats. You can also find tutorials, tips and reviews on the website.
Made by Rae: Made by Rae is a blog that features many free and paid patterns for baby clothes, as well as other sewing projects. You can find detailed instructions, photos and videos on how to make the clothes. You can also join the community and share your creations.
Oliver + S: Oliver + S is a brand that sells high-quality and stylish patterns for baby and children’s clothes. You can order the patterns online or find them in local shops. You can also access free tutorials, guides and resources on the website.
When choosing patterns for your baby clothes, you should also consider the following factors:
Size: You should choose patterns that match your baby’s current size or slightly larger, as babies grow fast and you don’t want your clothes to be too tight or too loose. You can measure your baby’s chest, waist, hips, length and other dimensions and compare them to the pattern size chart. You can also adjust the pattern by adding or subtracting seams or hems as needed.
Style: You should choose patterns that suit your baby’s personality and occasion. You can choose from different styles, such as classic, modern, vintage, cute, funky, etc. You can also mix and match different patterns to create unique outfits for your baby.
Difficulty: You should choose patterns that match your sewing skills and experience. You can choose from different levels of difficulty, such as beginner, intermediate, advanced, etc. You can also look for patterns that have clear instructions, diagrams and ratings to help you along the way.
Once you have chosen your patterns, you should gather the tools you need to make your baby clothes. Some of the essential tools are:
Sewing machine: A sewing machine is a device that uses a needle and thread to stitch fabrics together. You can use a sewing machine to make most types of baby clothes, such as shirts, pants, dresses, etc. You should have a sewing machine that is in good condition and has different settings and functions to suit your needs.
Serger: A serger is a type of sewing machine that uses multiple threads to create overlock stitches that finish the edges of fabrics. You can use a serger to make knit or stretchy fabrics more durable and neat. You should have a serger that is easy to use and has different options and features to suit your needs.
Scissors: Scissors are tools that have two blades that cut fabrics when pressed together. You can use scissors to cut out your patterns and fabrics according to your measurements and markings. You should have sharp scissors that are comfortable to hold and have different sizes and shapes to suit your needs.
Pins: Pins are small metal objects that have a sharp point at one end and a round head at the other end. You can use pins to hold fabrics together temporarily before sewing them. You should have enough pins that are strong and smooth and have different colors and sizes to suit your needs.
Measuring tape: A measuring tape is a flexible strip of material that has markings in inches or centimeters along its length. You can use a measuring tape to measure your baby’s body or your fabrics accurately. You should have a measuring tape that is long enough and has clear markings and numbers.
Marking tools: Marking tools are devices that leave marks on fabrics that indicate where to cut, sew or fold them. You can use marking tools such as chalk, pencils, pens or tailor’s tacks to mark your fabrics according to your patterns. You should have marking tools that are easy to see and remove from your fabrics.
Iron: An iron is a device that uses heat and pressure to smooth out wrinkles or creases from fabrics. You can use an iron to press your fabrics before or after cutting or sewing them. You should have an iron that is clean and has different settings and functions to suit your needs.
Seam ripper: A seam ripper is a tool that has a sharp hook at one end and a handle at the other end. You can use a seam ripper to undo stitches or seams that are wrong or unwanted. You should have a seam ripper that is sharp and easy to use.
Step 3: Cut, sew and decorate your clothes
The third step to making your own baby clothes is to cut, sew and decorate your clothes. This is the most fun and creative part of the process, where you can turn your fabrics and patterns into actual clothes for your baby. You can follow these general steps to cut, sew and decorate your clothes:
Cut: To cut your fabrics, you should first lay them flat on a large and clean surface, such as a table or a floor. You should then place your patterns on top of your fabrics and pin them in place. You should then use your scissors to cut along the edges of your patterns, leaving some extra fabric for seam allowances. You should then remove the pins and the patterns from your fabrics and label them accordingly.
Sew: To sew your fabrics, you should first set up your sewing machine or serger according to your instructions and preferences. You should then thread your machine with the appropriate color and type of thread. You should then place your fabrics right sides together and pin them along the seams. You should then use your machine to stitch along the seams, following the instructions and markings on your patterns. You should then trim the excess fabric and press the seams open or flat with your iron. You should repeat this process until you have sewn all the pieces of your clothes together.
Decorate: To decorate your clothes, you can use various embellishments, such as buttons, snaps, zippers, ribbons, lace, appliques, embroidery, etc. You can use these embellishments to add some color, texture, pattern or personality to your clothes. You can use your sewing machine, serger, needle or glue to attach these embellishments to your clothes. You should follow the instructions and guidelines on how to use these embellishments safely and correctly.
When cutting, sewing and decorating your clothes, you should also consider the following factors:
Quality: You should aim for high-quality results when making your own baby clothes. You should use good-quality fabrics, threads and tools that are suitable for your project. You should also use proper techniques and methods that ensure durability and neatness of your clothes. You should also check for any errors or defects in your clothes and fix them as soon as possible.
Safety: You should ensure safety when making your own baby clothes. You should use tools that are safe and appropriate for your skill level and age. You should also avoid using any materials or embellishments that can pose a choking or injury hazard for your baby. You should also wash and sanitize your clothes before letting your baby wear them.
Comfort: You should ensure comfort when making your own baby clothes. You should use fabrics that are soft, breathable and comfortable for your baby’s skin. You should also avoid using any materials or embellishments that can irritate or scratch your baby’s skin. You should also make sure that your clothes fit well and allow enough room for movement and growth.
Step 4: Care for your clothes
The fourth step to making your own baby clothes is to care for your clothes. You want to keep your clothes clean, fresh and in good shape for as long as possible. You can follow these general tips to care for your clothes:
Wash: You should wash your clothes regularly to remove any dirt, stains or odors from them. You should follow the care instructions on the fabric label or tag when washing your clothes. You should use gentle detergent and cold water to prevent fading or shrinking. You should also avoid using bleach, fabric softener or dryer sheets that can damage or discolor your clothes. You should also wash your clothes separately or with similar colors to prevent bleeding or transfer of colors.
Dry: You should dry your clothes properly to prevent wrinkling or mildew from forming on them. You should follow the care instructions on the fabric label or tag when drying your clothes. You can use a dryer or a clothesline to dry your clothes, depending on your preference and availability. You should use low heat and gentle cycles to prevent shrinking or stretching. You should also avoid overloading or overdrying your clothes that can cause wear and tear.
Store: You should store your clothes carefully to preserve their shape and quality. You should follow the care instructions on the fabric label or tag when storing your clothes. You can use hangers, drawers, boxes or bags to store your clothes, depending on your space and convenience. You should fold or hang your clothes neatly and loosely to prevent creasing or stretching. You should also avoid exposing your clothes to direct sunlight, heat, moisture or insects that can damage or fade them.
When caring for your clothes, you should also consider the following factors:
Frequency: You should adjust the frequency of washing, drying and storing your clothes according to how often you use them and how dirty they get. You may need to wash and dry your clothes more often if you use them frequently or if they get stained or smelly. You may need to store your clothes more carefully if you use them rarely or if they are delicate or special.
Repair: You should repair your clothes as soon as possible if they get torn, ripped, snagged or otherwise damaged. You can use your sewing machine, serger, needle or glue to fix any holes, seams, hems or edges of your clothes. You can also use patches, buttons, zippers or other embellishments to cover up or replace any missing or broken parts of your clothes.
Recycle: You should recycle your clothes if they are too worn out, outgrown or unwanted. You can donate, sell or swap your clothes with others who may need or want them. You can also repurpose, upcycle or refashion your clothes into new items, such as quilts, pillows, bags, toys, etc.
Step 5: Enjoy your clothes
The fifth and last step to making your own baby clothes is to enjoy your clothes. You have worked hard and creatively to make your own baby clothes, and you should be proud of your achievements. You can enjoy your clothes by:
Wearing: You can let your baby wear your clothes and see how they look and feel on them. You can also take photos or videos of your baby wearing your clothes and share them with your family and friends. You can also mix and match your clothes with other items to create different outfits for different occasions.
Gifting: You can give your clothes as gifts to other babies or parents who may appreciate them. You can also personalize your clothes with names, initials, messages or other details to make them more special and meaningful. You can also wrap or package your clothes in a nice and creative way to make them more attractive and appealing.
Learning: You can learn from your experience of making your own baby clothes and improve your skills and knowledge. You can also learn from other sources, such as books, magazines, websites, blogs, videos, etc., that offer more information, ideas and inspiration for making baby clothes. You can also join groups, clubs, classes or workshops that teach or support making baby clothes.
Making your own baby clothes is a fun and creative project that you can do with or for your baby. It can also save you money, reduce waste and express your style. By following these 5 easy steps, you can make your own baby clothes in no time. We hope you enjoyed this article and found it helpful. Happy sewing!

Leave a comment